

General Western Blot Protocol
Methods and Principles from our Scientific Staff
The Western blot is an analytical technique used to detect specific proteins in a sample. The technique uses gel electrophoresis to separate native or denatured proteins by the size of the polypeptide or by the 3-D structure of the protein. Leinco Technologies offers a wide range of both polyclonal and monoclonal antibodies against thousands of proteins which can be used for the western blot protocol.
This protocol provides an initial set of conditions; however, further optimization may be required on an individual basis.

Prepare Cell/Tissue Lysate(s)
- To the protein sample, add the appropriate sample buffer. Sample buffers commonly used at Leinco are listed in the buffer recipes below.
- Select the appropriate acrylamide percentage for the gel. The following may be used as a guideline: for proteins of MW over 100 kDa use 7%, 50-100 kDa use 10%, 20-50 kDa use 12%, < 20 kDa use 15%. Alternatively, a gradient gel (4-12%, 10-20%) can be used if the MW is unknown or a wide range of proteins is desired for multiple probing.
- Place gel in running chamber and fill with an appropriate running buffer (see buffer recipe below).
- Load 5-10 μL of pre-stained molecular weight marker standard into well. Add appropriate volume of samples to subsequent wells.
- Electrophorese at a constant voltage (100-200 V – gel dependent) until the dye front has reached the bottom of gel.
Protein Transfer (using tank transfer method)
- After resolving the protein(s) on the gel, carefully remove the gel from the cassette and place it along with blotting pads in transfer buffer.
- Assemble transfer sandwich by orientating cathode, fiber pad, filter paper, gel, membrane, filter paper, fiber pad and anode so protein transfer goes in the direction of cathode to anode. Pay special attention to prevent or remove air bubbles during assembly, as bubbles will cause interruptions in protein transfer (Anode is typically color-coded in red, while cathode is typically color-coded in black). Note: The choice of membrane (nitrocellulose / PVDF) depends on the protein of study and the antibodies used. PVDF is particularly useful if wanting to perform N-terminal sequencing or working with small or highly charged proteins. However, this membrane must first be pre-wetted by soaking in methanol prior to use. Place the transfer sandwich into the transfer unit and place into the gel box. The transfer process will generate heat, so to avoid band smearing, use a chilling unit, pre-chilled transfer buffer, or carry out the transfer in a cold room.
- Fill the unit with sufficient transfer buffer (see recipe) to cover the entire membrane(s).
- Transfer for 1-2 hrs at 100 V. To confirm transfer, carefully disassemble the sandwich and verify the presence of the pre-stained molecular weight marker on the membrane. Sample transfer and relative concentration can be assessed by staining the membrane with Ponceau S solution (0.1% Ponceau S, 5% acetic acid). This is a reversible stain which is removed by a simple wash using UltraWash-TrisTM (Prod. No. W100).
Buffer Recipes
- SDS sample buffer, non-reducing (4x): 0.25 M Tris-HCl pH 6.8, 8% SDS, 30% Glycerol, 0.02% Bromophenol Blue
- SDS sample buffer, reducing (4x): 0.25 M Tris-HCl pH 6.8, 8% SDS, 30% Glycerol, 0.02% Bromophenol Blue containing a reducing agent (add 10% BME or 0.3M DTT)
NOTE – Samples prepared in reducing buffer should be boiled for 5-10 minutes prior to loading. - Native sample Buffer (4X):
- SDS Running Buffer (10x) stock: 30.3 g Tris, 144 g Glycine, 10 g SDS and make up to 1 L with water. Dilute 100 ml into 900 ml water to make 1x running buffer
- Transfer buffer: 25 mM Tris pH 8.5, 0.2 M Glycine, 20% Methanol
- Ponceau S solution: 0.1% Ponceau S, 5% acetic acid
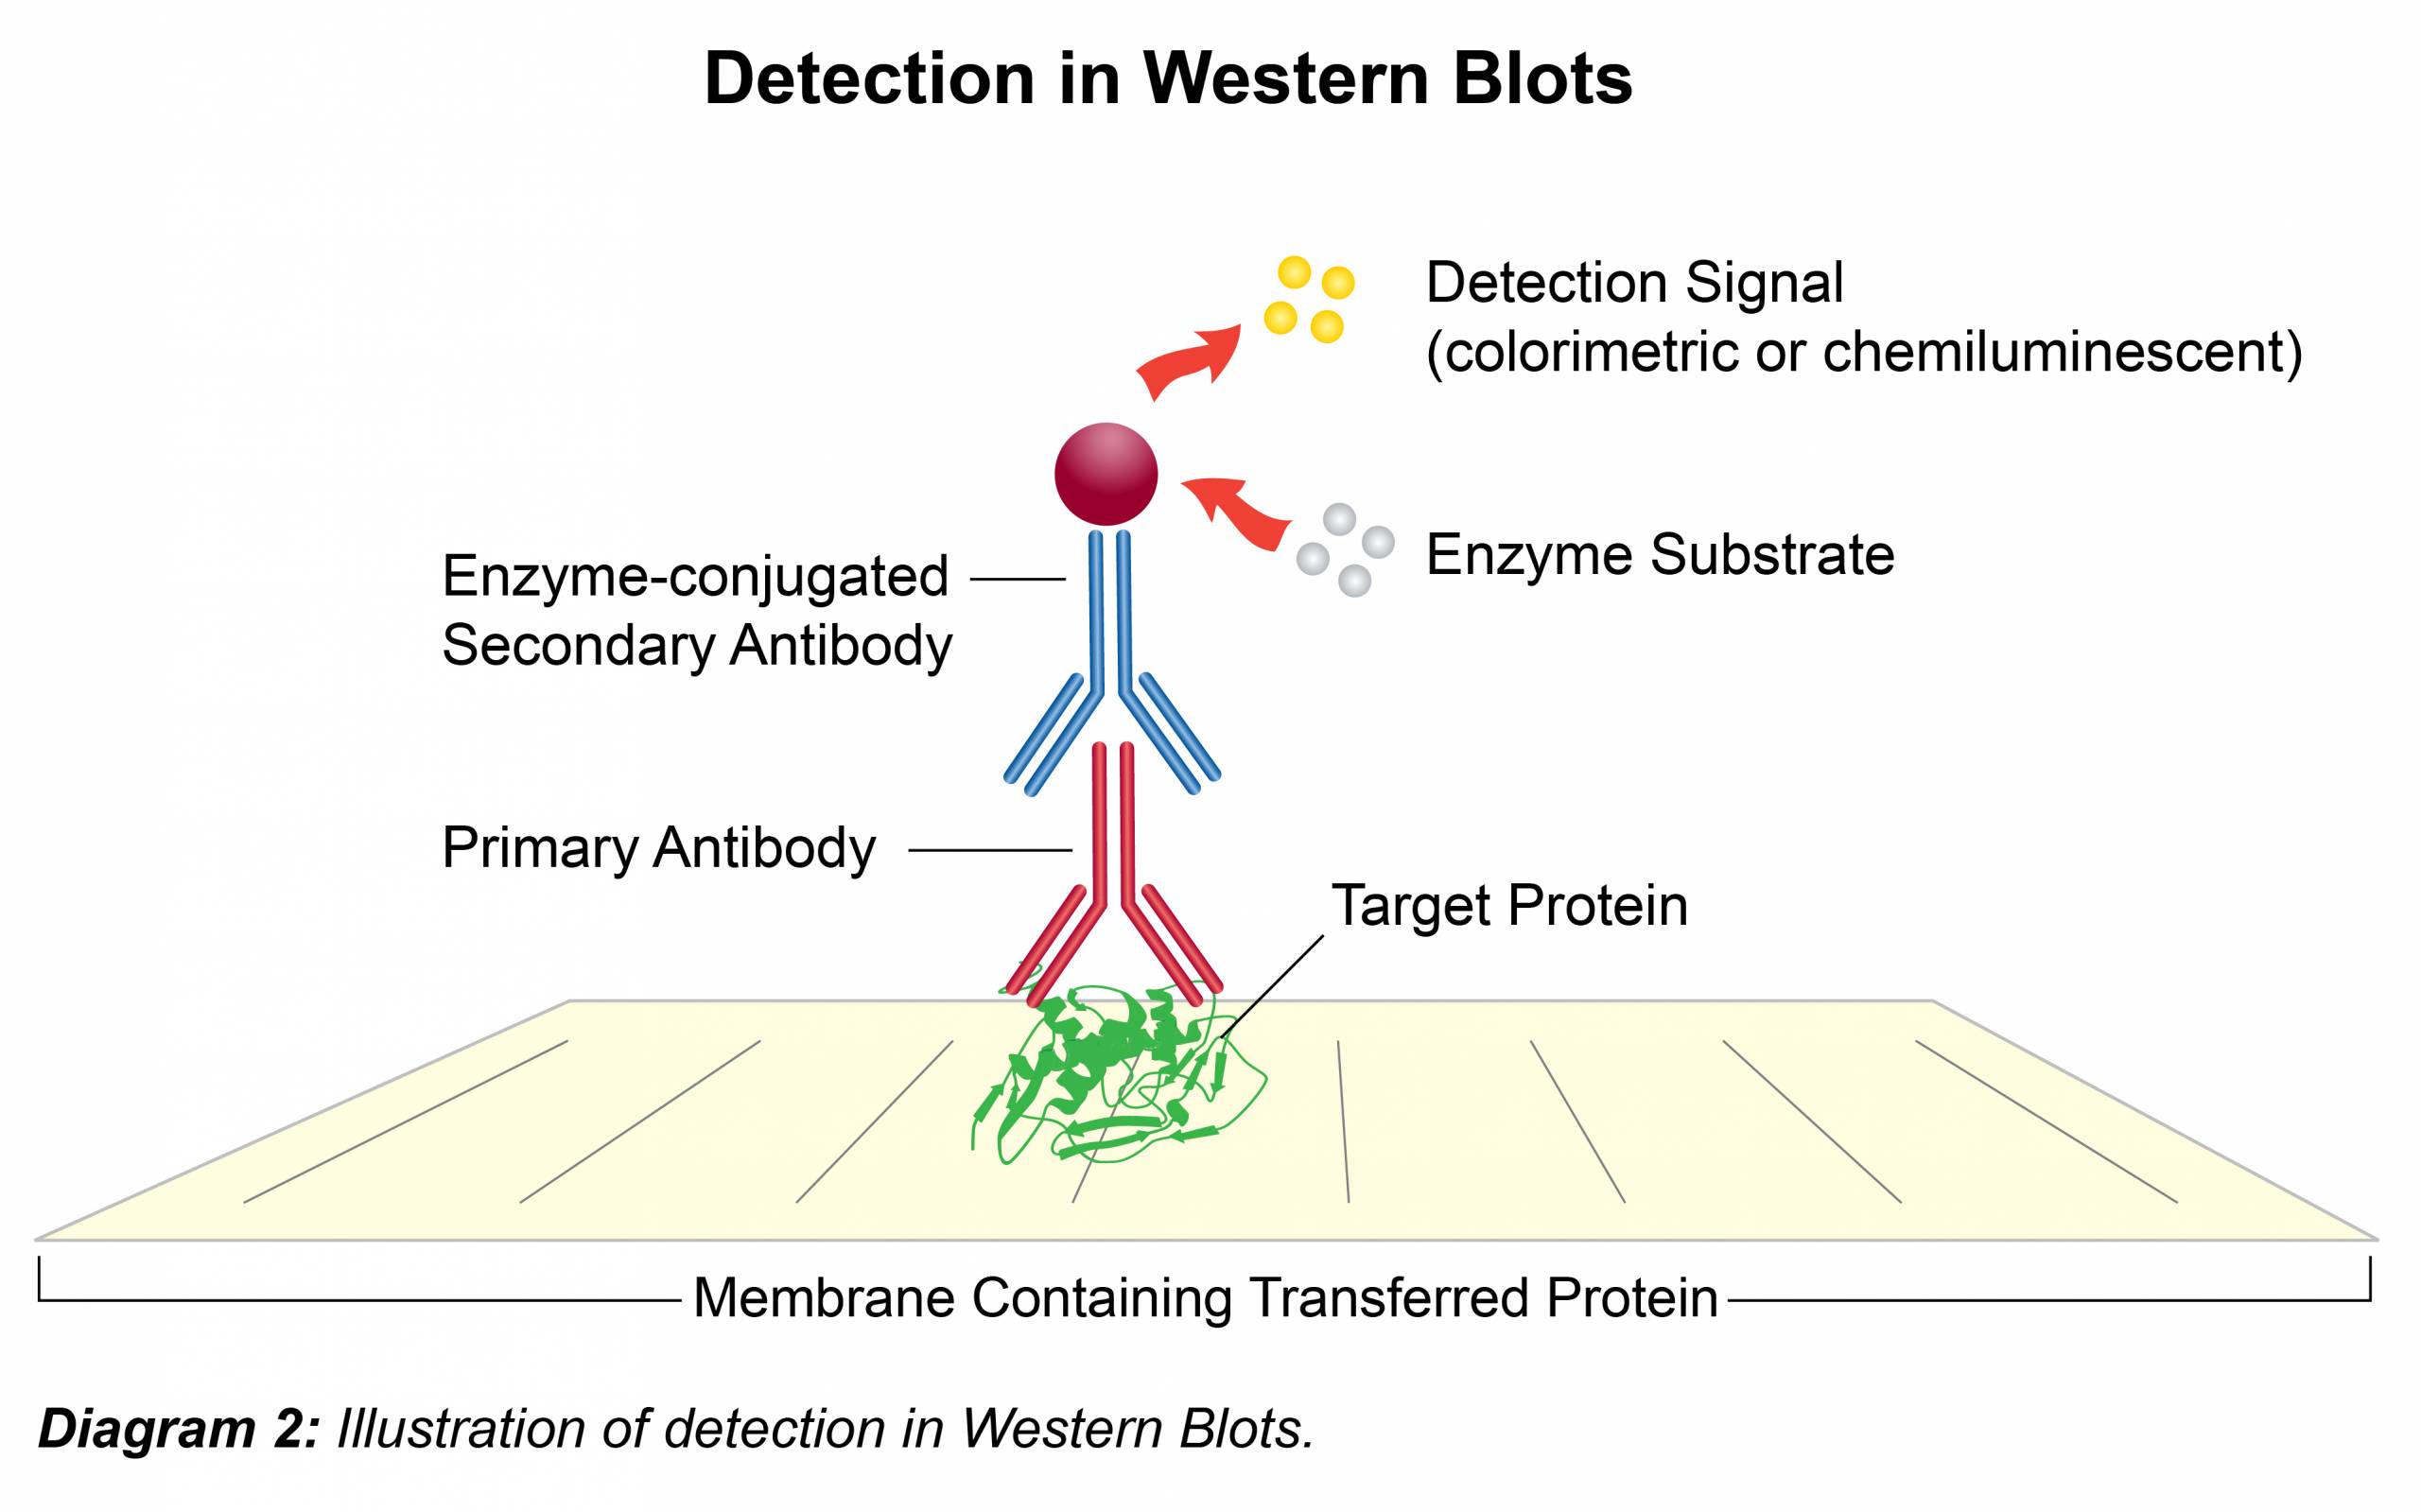
Immunodetection
- To minimize background incubate membrane in blocking solution (UltraBlock-BSA; Prod. No. B395) for 1 hour at room temperature or at 4°C overnight with shaking.
- Dilute the primary antibody (1° Ab) in UltraBlock-BSA according to Leinco Technologies suggestion located on all product data sheets. Add the primary antibody to membrane and incubate 1 hour at room temperature or at 4°C overnight with shaking.
- Remove antibody solution and wash membrane three times for 5-15 minutes each with UltraWash-TrisTM (Prod. No. W100).
- Dilute the secondary antibody (2° Ab) in UltraBlock-BSA according to Leinco Technologies suggestion located on all product data sheets. Add to membrane and incubate for 1-2 hours at room temperature with shaking. Secondary antibodies conjugated with horseradish peroxidase (HRPO) allow for rapid, cost efficient and convenient detection. (Follow Link for HRPO-labeled secondary antibodies available from Leinco.)
- Remove the antibody solution and wash membrane three times for 5-15 minutes each in UltraWash-TrisTM (Prod. No. W100).
- For HRPO labeled secondary antibodies, add 5 ml (or sufficient volume to cover the membrane) of TMB-HRPO Membrane Substrate (Prod. No. T116) and incubate at room temperature for approximately 5 min or until bands have developed. To stop the reaction, rinse the membrane with reagent grade water.
- For detecting secondary antibodies that lack HRPO; there are numerous chemiluminescence reagents available with each manufacturer offering a range of detection sensitivities. These typically take the form of two solutions which are combined and then incubated immediately on the membrane for 1-5 minutes. The membrane is then exposed to X-ray film for up to 1 hour, depending on protein signal and developed in a dark room using a western processor.
